I would like to celebrate Science week with a little model Einstein the children can make from this really simply kit I have created.
I have included the instructions on how I made my Lucky Leprechaun as the ideas are the same, just different colours of clothes and a different face.
I successfully had children in Year 1 and Year 2 make these models on their own.
If you love what I do, please follow me and also look for more of my fun items in my store.
Unlock Creativity This Holiday Season with Our Christmas Picture Frame Lesson Plan
Get ready to brighten your classroom with the Fun with Christmas Picture Frames lesson plan, perfect for engaging 3rd-grade students in a festive, hands-on activity! This 50-minute lesson not only introduces students to different types of Christmas-themed picture frames but also encourages creative expression while celebrating the joy of the holiday season.
Lesson Objective:
Students will explore various styles of Christmas picture frames and learn how to use them creatively in art projects.
Materials Needed:
A variety of Christmas-themed picture frames (paper or cardboard)
Colored paper for vibrant decorations
Scissors to craft unique designs
Glue sticks for assembling their creations
Crayons or markers to add personal flair
Optional: Photos or drawings to showcase in their frames
Lesson Structure:
Introduction (5 minutes): Begin the session by displaying a selection of Christmas picture frames. Facilitate a discussion on the unique features of each frame, emphasizing how they enhance the beauty of photos and drawings during the festive season.
Types of Christmas Frames (10 minutes): Introduce students to different frame styles, including Santa frames, Christmas tree frames, snowflake designs, and holly and berries frames. Discuss how each style evokes a unique Christmas spirit.
Frame Decorating Activity (20 minutes): Distribute plain paper frames and guide students in decorating them with colored paper, crayons, or markers. Encourage them to choose themes like Santa’s workshop, snowy scenes, reindeer, or Christmas trees, promoting imagination and creativity.
Share and Explain (10 minutes): Have students present their decorated frames to the class and explain their design choices. Foster a supportive atmosphere by encouraging positive feedback from peers.
Closing Activity (5 minutes): Conclude by discussing where students might display their frames at home, suggesting they use them for family photos or personal artwork. Remind them how frames can transform ordinary pictures into cherished memories.
This lesson plan not only provides a fun, interactive way for students to explore Christmas picture frames but also nurtures creativity and self-expression. Additionally, the accompanying DOK questions encourage deeper thinking about gift-giving and the meaning behind homemade creations, making this lesson a comprehensive celebration of the holiday spirit!
Unlocking Creativity: The Benefits of Purchasing 30 Pictures Showcasing Different Art for Teachers
Investing in a set of 30 pictures that display diverse forms of art can be a transformative addition to any classroom. These visuals not only enhance the learning environment but also provide numerous opportunities for engagement, creativity, and critical thinking among students. Here’s why teachers should consider purchasing these art pictures and how they can be effectively utilized in the classroom.
Visual Learning: Art is a powerful medium that conveys concepts and emotions visually. By incorporating these pictures, teachers can cater to visual learners, making lessons more accessible and engaging. Students can analyze colors, techniques, and styles, fostering a deeper understanding of artistic expression.
Cultural Appreciation: Featuring a variety of art styles from different cultures introduces students to global perspectives. This promotes cultural awareness and appreciation, encouraging students to explore and respect diversity in artistic expression.
Inspiration for Creativity: These art pictures can inspire students to create their own works. Teachers can use them as prompts for drawing, painting, or mixed media projects, allowing students to express themselves creatively while developing their artistic skills.
Art History Lessons: The collection can serve as a valuable resource for teaching art history. Educators can discuss the significance of various movements, artists, and techniques, enriching students’ understanding of the evolution of art.
Interdisciplinary Connections: Art can be integrated into other subjects such as literature, science, and social studies. Teachers can use the pictures to spark discussions, write creatively, or analyze connections between art and historical events or scientific concepts.
Classroom Decor: These pictures can enhance the classroom environment when displayed on walls or bulletin boards. A visually stimulating space fosters creativity and encourages a positive atmosphere for learning.
Discussion Starters: Art is often open to interpretation. Teachers can use these pictures to initiate discussions about themes, emotions, and messages conveyed through art, promoting critical thinking and analytical skills.
Assessment Tools: Educators can use the pictures as assessment tools by asking students to critique, compare, or create art inspired by the images. This allows for a deeper understanding of artistic concepts and techniques.
In conclusion, purchasing a set of 30 pictures showcasing different art forms is a worthwhile investment for teachers. These visuals not only enhance the classroom experience but also promote creativity, cultural appreciation, and interdisciplinary learning. By integrating these art pictures into lessons, educators can foster a rich educational environment that inspires and engages students.
Lesson Plan: Exploring the Four Seasons (KS2)
The Exploring the Four Seasons is a dynamic 50-minute educational experience designed for Key Stage 2 students. By the end of the lesson, students will be able to identify and describe the four seasons, enhancing their understanding of the natural world. Through engaging activities such as a Seasons Photo Gallery Walk and a Season Collage Creation, children will enjoy hands-on learning that stimulates their creativity and critical thinking.
Why Children Will Love This Lesson
This lesson captivates students with its interactive approach. The opportunity to explore vibrant photos allows them to visually connect with each season, fostering curiosity and excitement. The collaborative group activities encourage teamwork and communication, making learning fun! Creating a season-specific collage not only engages their artistic skills but also allows them to express their understanding of weather, plants, animals, and seasonal activities. Children will enjoy presenting their work, building confidence and public speaking skills.
Benefits for Teachers
Educators will appreciate the structured yet flexible nature of this lesson plan. It provides a clear objective and a variety of activities that cater to different learning styles. The incorporation of 20 TOK KS2 questions about seasons encourages deeper discussions, promoting critical thinking and inquiry-based learning. Teachers can observe student participation and understanding during activities, ensuring that each child grasps the key concepts of the seasons. Furthermore, the extension activity discussing seasonal differences globally broadens students’ perspectives, enriching their learning experience.
In summary, the Exploring the Four Seasons lesson plan not only makes learning about nature enjoyable for students but also equips teachers with valuable resources to facilitate meaningful discussions about the world around us.
Keywords and Hashtags:
#FourSeasons #SeasonalLearning #ElementaryEducation #CreativeCollage #InteractiveLearning #KST2 #NatureEducation #VisualLearning #Teamwork #CriticalThinking #EducationalResources #LessonPlans
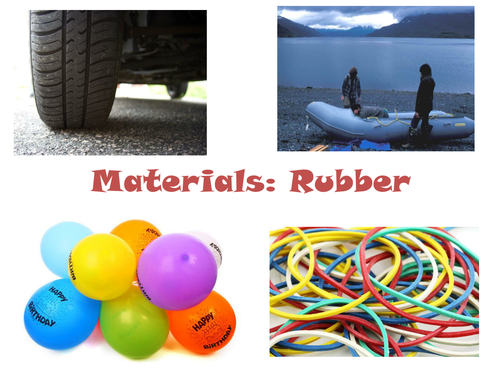
Are you teaching about the uses of different materials? Are you looking for photos and images about the different uses of rubber? I have collected together 17 different images of things made of rubber you can share with your class.
You could look at it directly as a presentation and discuss the different uses of rubber being shown in each of photos.
You could print off and laminate the photos to make an interesting, eye-catching display about uses of rubber.
The students could also take the laminated photos and sort them into different uses of rubber. The students can then discuss what they think why people use rubber.
The photos could also be used as prompts for creative writing, factual writing or descriptive writing.
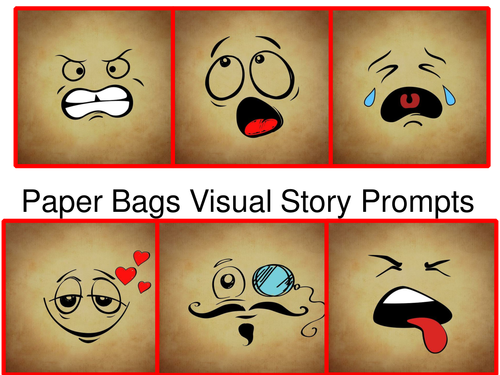
You could look at it directly as a presentation and discuss the different feelings Mr Paper Bag being shown in each of the photos.
You could print off and laminate the photos to make an interesting, eye-catching set of story prompts.
The students could also take five of the laminated photos and create them into a story .
The photos could also be used as prompts for creative writing, factual writing or descriptive writing.
Are you teaching your students about digital art or how to create 3D computer graphic images? Are you looking for some inspiring examples to share with your class? I have collected 17 high quality images which you are welcome to download and share.
You could print off and laminate the photos to make an interesting, eye-catching display about 3D computer graphics images.
The students could also take the laminated photos and sort them into different types of 3D computer graphics images. The students can then discuss how they think they were made.
The photos could also be used as prompts for creative writing, factual writing or descriptive writing.
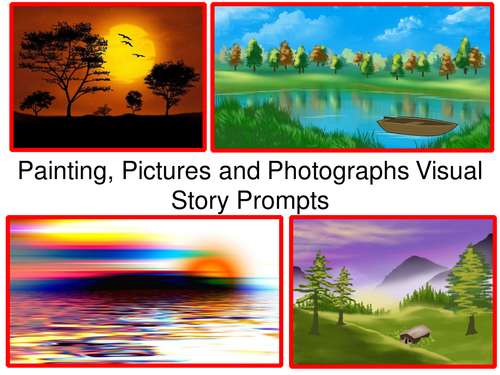
You could look at it directly as a presentation and discuss the different locations being shown in each of the photos.
You could print off and laminate the photos to make an interesting, eye-catching set of story prompts.
The students could also take five of the laminated photos and create them into a story .
The photos could also be used as prompts for creative writing, factual writing or descriptive writing.
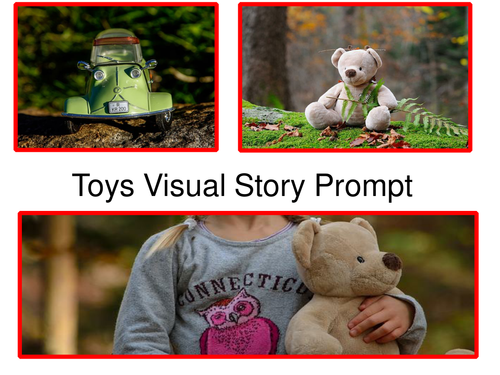
You could look at it directly as a presentation and discuss the different toys being shown in each of the photos.
You could print off and laminate the photos to make an interesting, eye-catching set of story prompts.
The students could also take five of the laminated photos and create them into a story .
The photos could also be used as prompts for creative writing, factual writing or descriptive writing.
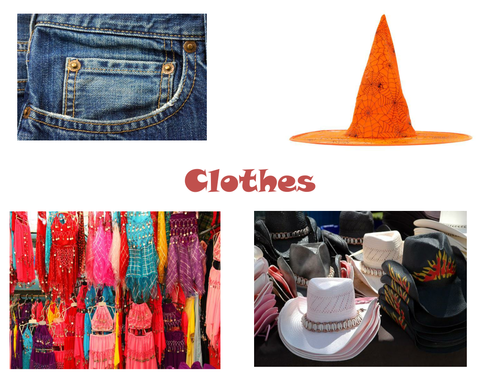
You could look at it directly as a presentation and discuss the different materials being shown in each of the photos.
You could print off and laminate the photos to make an interesting, eye-catching display about clothes.
The students could also take the laminated photos and sort them into different types of clothes. The students can then discuss about their favourite clothes.
The photos could also be used as prompts for creative writing, factual writing or descriptive writing.
You could look at it directly as a presentation and discuss the different clowns being shown in each of the photos.
You could print off and laminate the photos to make an interesting, eye-catching display about clowns.
The students could also take the laminated photos and sort them into different types of clowns.
The photos could also be used as prompts for creative writing, factual writing or descriptive writing.
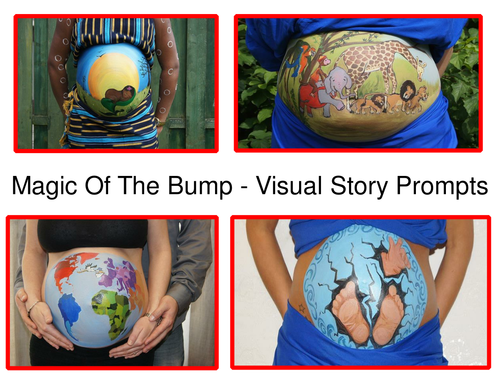
You could look at it directly as a presentation and discuss the different pregnant bumps being shown in each of the photos.
You could print off and laminate the photos to make an interesting, eye-catching set of story prompts.
The students could also take five of the laminated photos and create them into a story .
The photos could also be used as prompts for creative writing, factual writing or descriptive writing.
Certainly! Here are some examples of how the 33 different photos of bridges can be integrated into various lesson plans across different subjects:
Engineering and Technology
Lesson Topic: Types of Bridges
Activity: Present the photos of the six different types of bridges (beam, arch, suspension, cable-stayed, truss, and cantilever). Have students work in groups to research one type of bridge, its design, and its applications. Students can create a poster or presentation showcasing their findings, using the photos as visual aids.
Mathematics
Lesson Topic: Geometry in Bridges
Activity: Use the bridge photos to teach geometric concepts such as angles, shapes, and symmetry. Students can analyze the structures in the photos to identify geometric shapes and calculate areas and perimeters. A hands-on project could involve creating scale models of their chosen bridge type.
Science
Lesson Topic: Forces and Structures
Activity: Discuss the forces acting on bridges (compression, tension, and shear). Use the photos to illustrate how different bridge designs distribute these forces. Students can conduct experiments using materials like straws or popsicle sticks to build their own bridges and test their strength.
History and Social Studies
Lesson Topic: The Evolution of Bridge Design
Activity: Create a timeline of bridge construction through history, using the photos to represent key developments. Students can research historical bridges and their significance, discussing how engineering advancements have impacted society and transportation.
Art
Lesson Topic: Aesthetics in Bridge Design
Activity: Analyze the artistic elements of bridges using the photos. Students can create their own artistic interpretations of a bridge by drawing or painting. Encourage them to incorporate elements of design, color, and form based on the bridges they studied.
Creative Writing
Lesson Topic: Bridges as Metaphors
Activity: Use the bridge photos as inspiration for a creative writing assignment. Students can write short stories or poems that incorporate themes of connection, journeys, or overcoming obstacles, using the bridge imagery to enhance their narratives.
Environmental Studies
Lesson Topic: Impact of Bridges on Ecosystems
Activity: Discuss the environmental considerations of building bridges. Use the photos to explore the effects of bridges on wildlife and natural landscapes. Students can research a local bridge and present on its environmental impact and any conservation efforts related to it.
These examples demonstrate how the photos of bridges can serve as versatile tools in lesson plans, fostering engagement and deeper understanding across various subjects.
You could look at it directly as a presentation and discuss the different colors being shown in each of the photos.
You could print off and laminate the photos to make an interesting, eye-catching display about water color art techniques.
The students could also take the laminated photos and sort them into different styles of water coloring's. The students can then discuss how each one was created. Did any of them need special techniques?
The photos could also be used as prompts for creative writing, factual writing or descriptive writing.
You could look at it directly as a presentation and discuss the different positions being shown in each of photos.
This pack contains a 31 Teaching Activity Teacher Guide using these photo flash cards. These activities are quick and fun to do and will improve both your students' memory and vocabulary skills.
You could print off and laminate the photos to make an interesting, eye-catching display about Drawing Figures.
The students could also take the laminated photos and sort them into different positions. The students can then discuss what they think each one was saying or thinking.
The photos could also be used as prompts for creative writing, factual writing or descriptive writing.
You simply print off this pennant at the beginning of the year as a Getting to know you activity. I like the idea of laminating them and placing them directly above the different groups of children. The children can quickly learn more about each other.
The students have a chance to set themselves a fun target to achieve in the year. At the end of the year the students can then look again at their targets and see if they have achieved their goals. This could also make a very homework task. Get them to build up their pennants using different materials from around the home.
I added a reflection sheet for times children are not quite as good as you would like.
You could look at it directly as a presentation and discuss the different materials being shown in each of the photos.
I have added a second PowerPoint presentation which shows you how you could use this teaching resource in 31 different, fun ways in the classroom to make sure you get the most out of this teaching resource. I also create a Chinese Landscape Painting book for students. The basics are laid out to help them and then they can use water colours to complete the picture.
You could print off and laminate the photos to make an interesting, eye-catching display about China.
The students could also take the laminated photos and sort them into different Chinese activities.
The photos could also be used as prompts for creative writing, factual writing or descriptive writing.
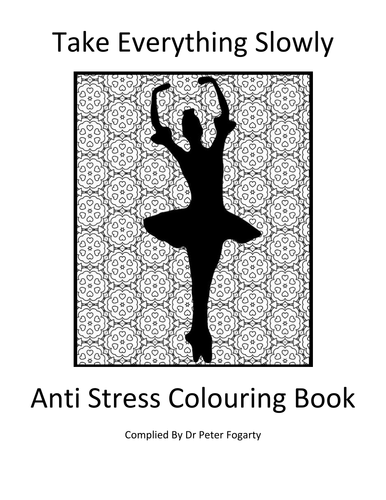
Teachers need some fun to. This is my adult colouring book for teachers. You could print it out for your class to quietly colour during tests (when they have completed them to calm and relax them), or during long staff meetings - nothing is more relaxing and constructive than a little light colouring.
This is to encourage staff to have a little time every day to think and reflect and not work. This is my attempt at improving the good life balance of staff.
All these images were in the public domain. In the majority of the cases however, it took both a long time to find, then even longer to use editing software to sharpen and improve the images.
I would love to know what people think of them.
This is a fun art project for a class. I have created an easy mini printable paper kit, which you can print out and assemble and create a class of mini lucky leprechauns.
The pack comes complete with printable leprechaun kits, and a step by step PowerPoint presentation show you and your class how to assemble these wonderful men.
I really hope you like them as I have dreams of making them for lots of different occasions throughout the year!
It is a fun way to celebrate St Patrick's Day on 17th of March and make sure every child in the class has something nice to bring home with them.
You could look at it directly as a presentation and discuss the different materials being shown in each of the photos.
You could print off and laminate the photos to make an interesting, eye-catching display about modern toys.
The students could also take the laminated photos and sort them into different types of toys. The students can then discuss who would like each toy and why.
The photos could also be used as prompts for creative writing, factual writing or descriptive writing.